Drivers
The Drivers section displays all the information you need to know about your drivers derived from tachograph and manual entries.
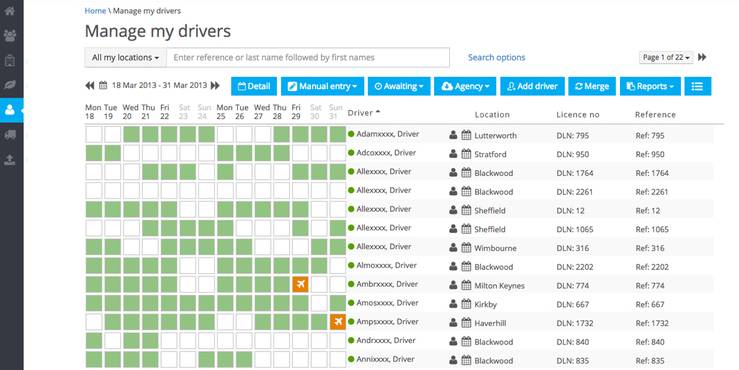
When you click on the driver tile you will go to the Manage my drivers screen. This is designed to allow you to view up to 30 of your drivers and their activities per page.
Activity data
The screen shows dates for a two week period. Each square represents a day and the colours represent a type of data.
The key gives an explanation of all the colours and you can hover over a day and a tooltip will also describe what type of information is in the square.
Search
You can change your driver search in the following ways:
- By location
- By first name or surname
- By reference number
- By date
If you want to search by first name put the % symbol before the name and then type it in.
You can also carry out a more refined search by clicking on Search options where you can search by:
- Driver type
- Driver status
- Drivers' hours infringements incurred
- Working time infringements incurred
- Show unpurchased data - selecting this will only show agency drivers that have unpurchased data in the date range and location selected.
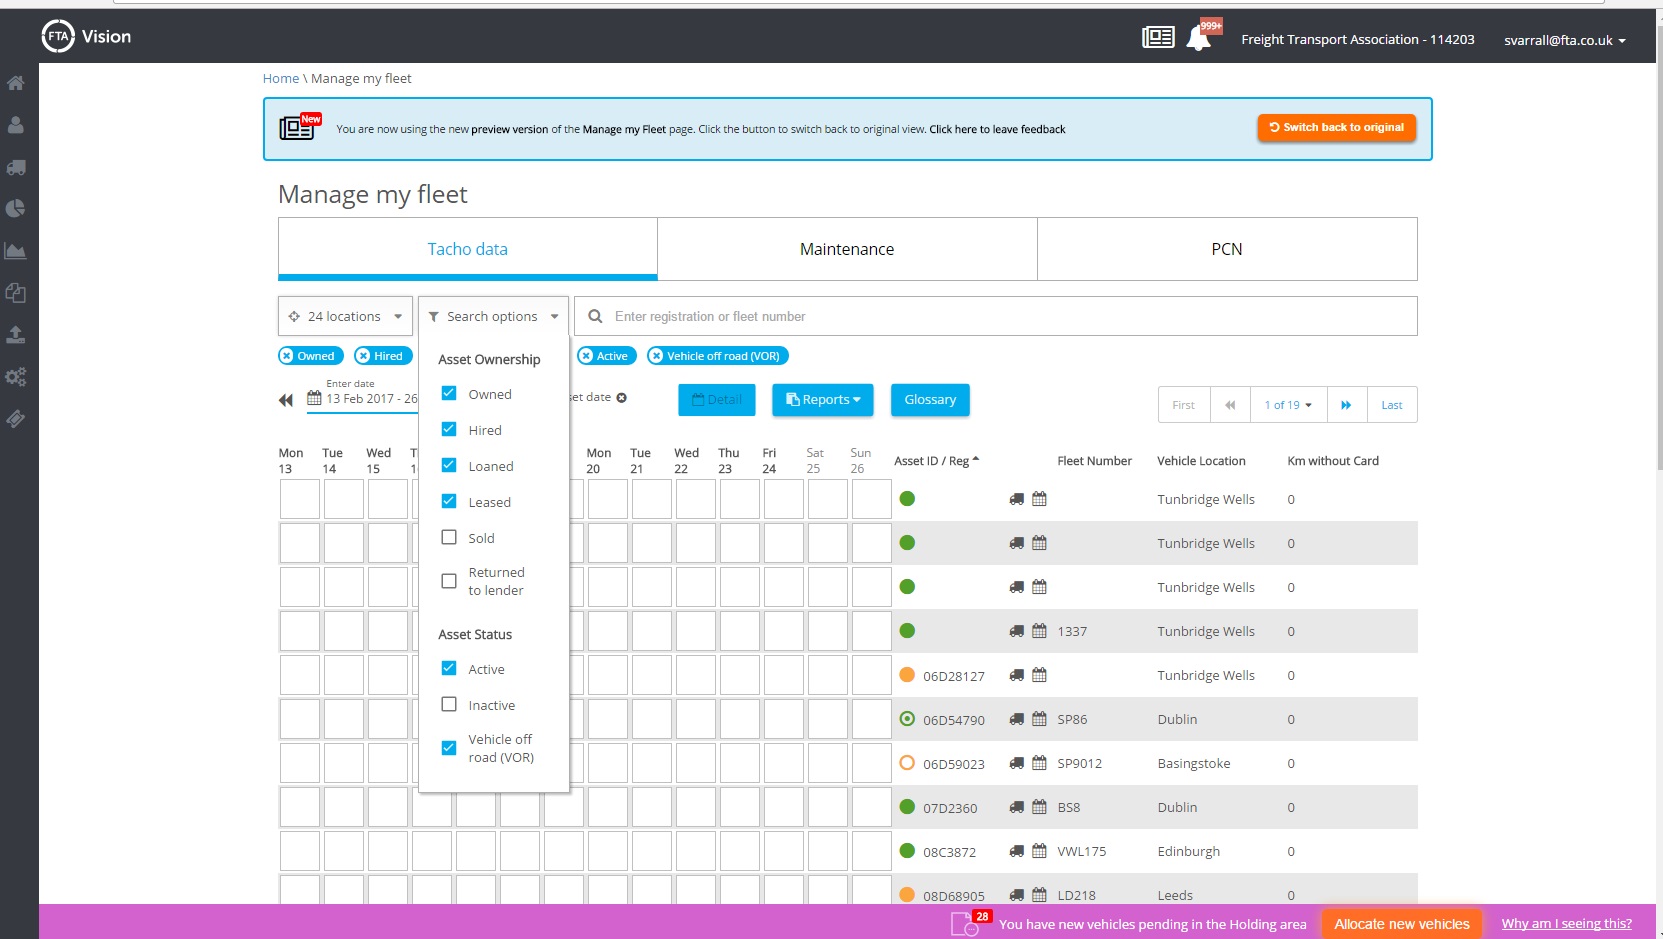
To close search options but retain the search criteria just click on Search options again.
Detail button
You can view each day's information in more detail by either
- Double clicking on the square
- Or selecting the square and clicking on the detail button.
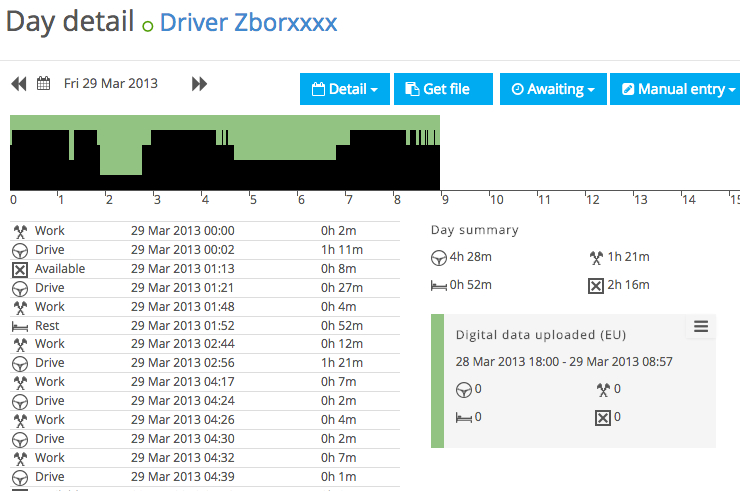
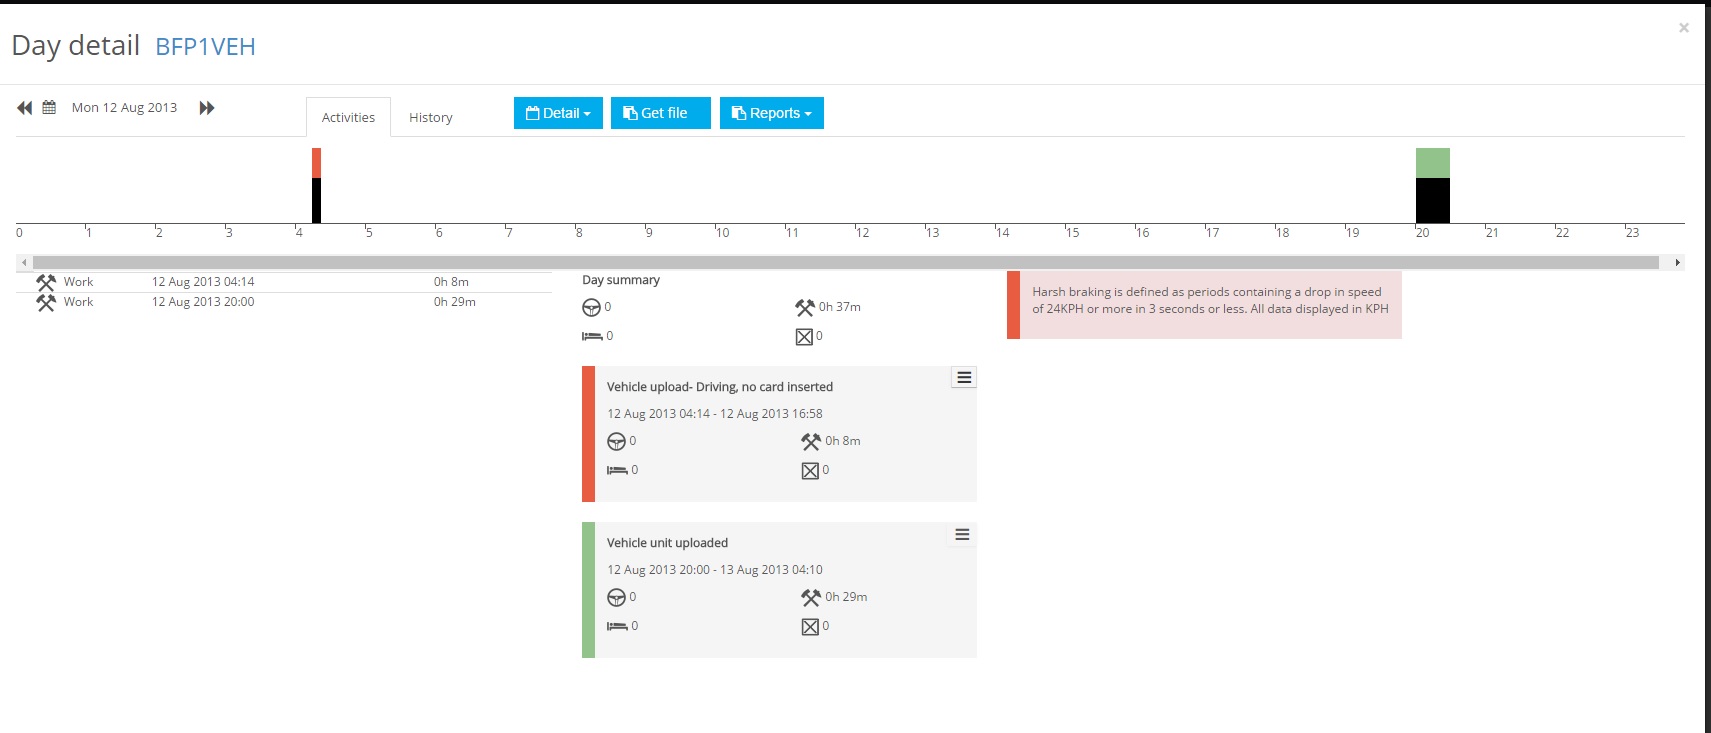
A detail box will display a fixed 24 hour period of activity data in a graphical and numeric format.
Both formats highlight the start and end of each activity and where a manual entry via the tachograph has been added.
Entry view
This display will also allow you to view an individual shift even if it crosses more than one day, just select detail at the top of the screen and choose which shift you would like to view.
To go back to the day detail click on detail at the top of the screen and select the date you would like to view.
Hours' infringements
If drivers hours infringements have taken place these will be described on the screen and marked in red on the graph and a tool tip will display the time and type of infringement.
Comments
Comments which will be displayed on the Driver Daily/Weekly report can be added by left clicking on the icon in the top right hand side of the summary screen and selecting comments. Simply type your comment and save.
Notes
Notes which will just be displayed on the Calendar and Detail view, not on the reports, can be added by clicking in the notes section and typing and saving.
Get File
Clicking here will allow you to retrieve the raw data file that includes data for that driver for that day.
Awaiting
Clicking here allows you to add and awaiting data flag to the date selected. You can choose from awaiting digital, awaiting analogue, awaiting printout, awaiting other or click delete awaiting to remove a tag on that day.
Manual entry
Clicking here will allow you to add detailed manual entries to an existing day's data. Just ensure that the detailed entries start and end times do not overlap with existing entries.
Reports
Clicking here will produce a PDF report for:
- Weekly statistics - a summary of all activities for the fixed week that includes the day that you are viewing.
- Activity detail - gives a detailed breakdown of all the activities for all the days in that fixed week that includes the date that you are viewing.
Awaiting Button
Clicking on the Awaiting drop down allows you to select various options to tag days reminding you that you are waiting for either digital, analogue, print, or other information from the driver.
You can add the tag by clicking, or CTRL clicking on several days for one or more drivers.
You can also add an awaiting tag by selecting a full column of dates by clicking on the day/date at the top of the column. Further columns can be selected by clicking on other day/dates at the top of the column.
To cancel a selected column just click on the selected day/date again.
To cancel selection of a specific day/s, CTRL click on the day/s in question
To cancel the entire selection click on any day.
When any of the awaiting data tags are added, the appropriate day will display a turquoise square on the Manage my drivers screen
Once the record has been delivered the tag can be removed by selecting the day/s using any of the methods described above, and choosing “Delete awaiting data” from the awaiting drop down options.
Awaiting data report
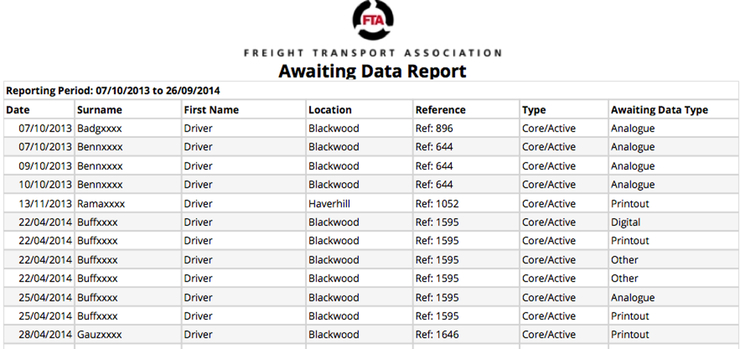
Within the Reports button is an Awaiting data report. This is designed to show all outstanding Awaiting data for all drivers in the search criteria from the start date of the search to today's date.
Agency data
The agency data button is used in conjunction with the advanced search option Show unpurchased agency data when used on the Manage my drivers screen. Selecting this option will only show agency drivers that have unpurchased data within the search criteria selected.
After selecting the show unpurchased data option you can then use the Agency drop down to select either
- purchase all selected data
- or purchase all the data on the page
To identify which days you would like to purchase hover over the date to see the registration and upload location.
Once you have made your selection those days purchased will change from grey to green and a message will highlight how many days have been bought.
Add Driver
Drivers are normally added automatically when a driver card is first uploaded and this is the recommended way of adding a driver. However if the driver does not have a driver card you can add the drivers details by clicking on the Add Driver button.
Essential Fields
When adding a driver you must complete the following:
- Surname
- First name
- Location
- Driver type
- Driver status
All other fields can be completed however we would recommend that you leave the licence details to be populated when the driver is able to upload a driver card. This will be added automatically along with the card number and card expiry date directly from the information on the driver card.
Merge
On occasions, for various reasons you may have the same driver added to the system more than once.
If this happens click on the Merge button and follow the step by step instructions.
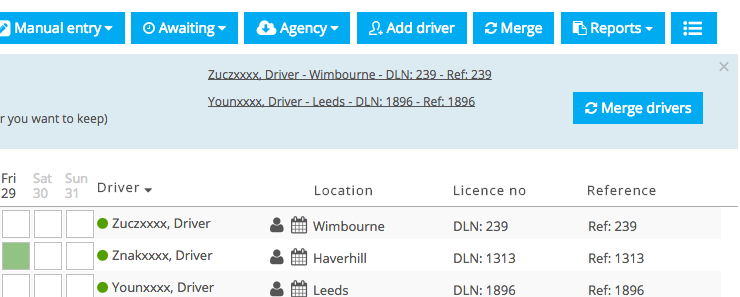
Clicking on Merge drivers will send a message to Tacho Admin to merge all the data for that driver to the one you have requested to keep.
We recommend that you always keep the driver with the correct licence number.
Reports
The report button on Manage my drivers includes 2 reports:
Awaiting Data - a PDF report designed to show all outstanding awaiting data for all drivers in the search criteria from the start date of the search to today's date.
Licence and Card Expiry - a report which can be displayed in PDF or Excel and works to a date 6 weeks ahead of today's date highlighting Driver Licences, HGV licences and driver cards due to expire in that 6 week period.
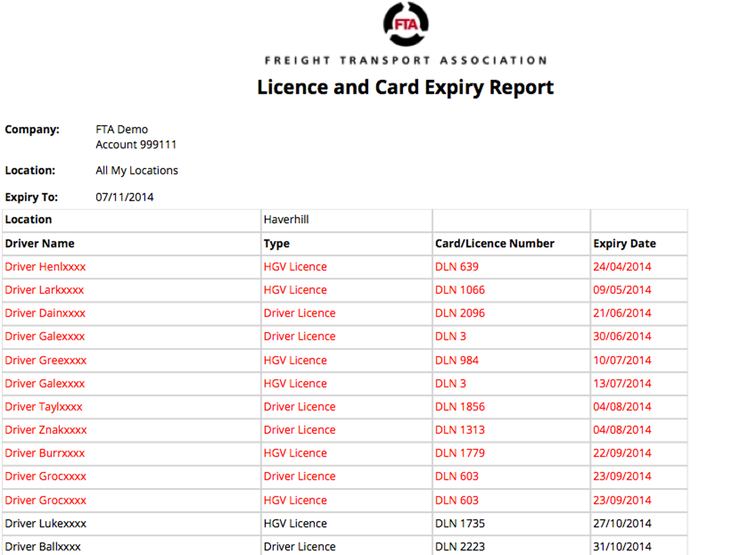
Licences or cards that have already expired and whose details have not been updated will be displayed in red until the new renewal dates are added to the driver profile.
Manual entries
Single click
Within the manual entries button are single click options for statutory holiday, extra holiday, sickness, and rest. These can be added to the drivers’ records in the following ways:
Selection of day/s
- Click or CTRL click selecting specific dates for one driver and selecting the relevant activity from the manual entries drop down list. The correct number of hours for working time calculation will be added to your analysis
- Click or CTRL click selecting specific dates across drivers and selecting the relevant activity from the manual entry drop down list. The correct number of hours for working time calculation will be added to your analysis
- Click or CTRL click, selecting a column or columns of dates and selecting the relevant activity from the manual entry drop down list. The correct number of hours for working time calculation will be added to your analysis
- Clicking or CTRL clicking on a day for one driver or several drivers where there is no data in that fixed week (Monday-Sunday) and select weeks sickness or a weeks’ sickness. The week will be populated with holiday or sickness. The correct number of hours for working time calculation will be added to your analysis
- Select a full column of dates by clicking on the day/ date at the top of the column. Further columns can be selected by clicking on other day/dates at the top of the column.
To cancel a selected column just click on the selected day/date again.
To cancel selection of a specific day/s, CTRL click on the day/s in question.
To cancel the entire selection click on any day.
Delete manual entries
Manual entries can be removed by selecting those you wish to cancel in any of the ways described above and selecting Delete manual entries.
Edit details
If you need to edit a manual entry (orange or lilac data) this can be done by left clicking on the icon at the top left hand side of the summary box and selecting edit.
Detailed Manual Entries
The manual entry button includes an option for detailed.
Clicking or CTRL clicking on a day for one driver or several drivers and selecting “Detailed” from the manual entries button, will allow you to add entries that are tailored to your drivers' day.
Clicking on the Activities drop down will show a selection of activities.
Pre-set will give the option of adding a pre-set time to that activity
AM- 9:00-13:00
PM- 13:00-17:00
Day- 9:00-17:00
24:00- 00:00-00:00
You can amend the order in which data is added by highlighting either End or Duration
If End is highlighted the start and end time of the activity will be added
If Duration is highlighted then the start time and duration of the activity should be added
Simply select the tick to keep adding lines and select Save when the entry is complete.
You can enter more than one set of detailed manual entries on a day, provided that the times do not overlap with other activities entered on that day. Simply select the day, select detail and then click Manual entry, selecting Add detailed… and add the information.
Driver type
Adjacent to each drivers name is an icon which depicts their type and status. Hovering over the icon will display a tool tip describing their type and status.
Driver Profile
Each driver has their own profile page which can be accessed by clicking on the driver icon adjacent to the drivers name and will include the following information.
Driver modal
This is the page that is shown when you first click on the icon and includes those details that you are most likely to edit.
It also includes performance data based on 3 main areas.
- Average infringements per day
- Average OCRS points per day
- Total MSI’s (most serious infringements) over a year
- Each driver is given a position in company and in location
To return to the Manage my drivers screen click on the x in the top right hand side of the screen.
Full profile
Clicking on the full profile allows you to view and add more information. Certain details will be automatically populated from the driver card including:
- Licence number
- Driver card number
- Card expiry
- Last card upload date
The rest of the information can be added manually.
To return to the Manage my drivers screen click on the blue driver icon on the left hand side of the screen.
Files
This tab incorporates all the raw data that has been uploaded via the PC for that driver and is saved in folders labelled by month.
Click on the folder and then click on the file that you would like to view.
To return to Manage my drivers, click on the blue driver icon on the left hand side of the screen.
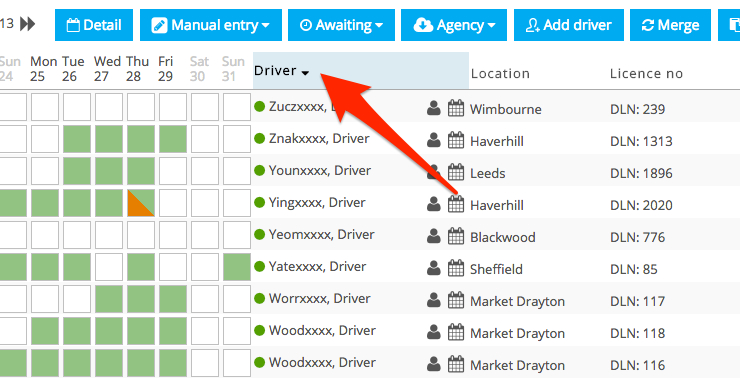
Driver detail columns
The following columns in the Manage my drivers screen can be sorted:
- Driver name - A-Z or Z-A
- Location - A-Z or Z-A
- Reference number - Highest to lowest or lowest to highest
Just click on the heading to change the sorting.
